While planning a trip to the Indian jungle to film a short documentary about Pench National Park, my colleagues at cinema5d challenged me to leave my standard gear at home and take the new cinema camera Z CAM E2 instead – would it be up to the task?
Edit: just after completing this review, Z CAM introduced a new firmware update (V 0.88) featuring ZRAW (internal RAW capture, partial debayer, supports up to 4096×2160@30fps initially). We might take a closer look at this ZRAW firmware in the near future.
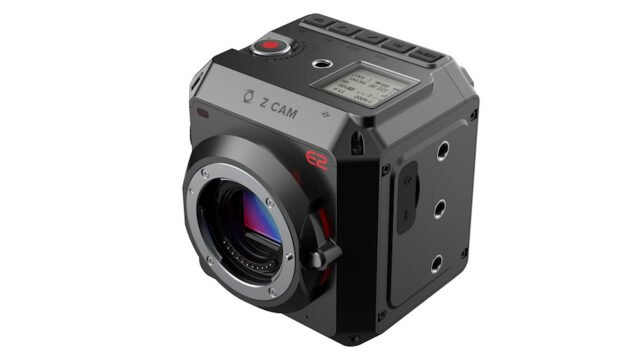
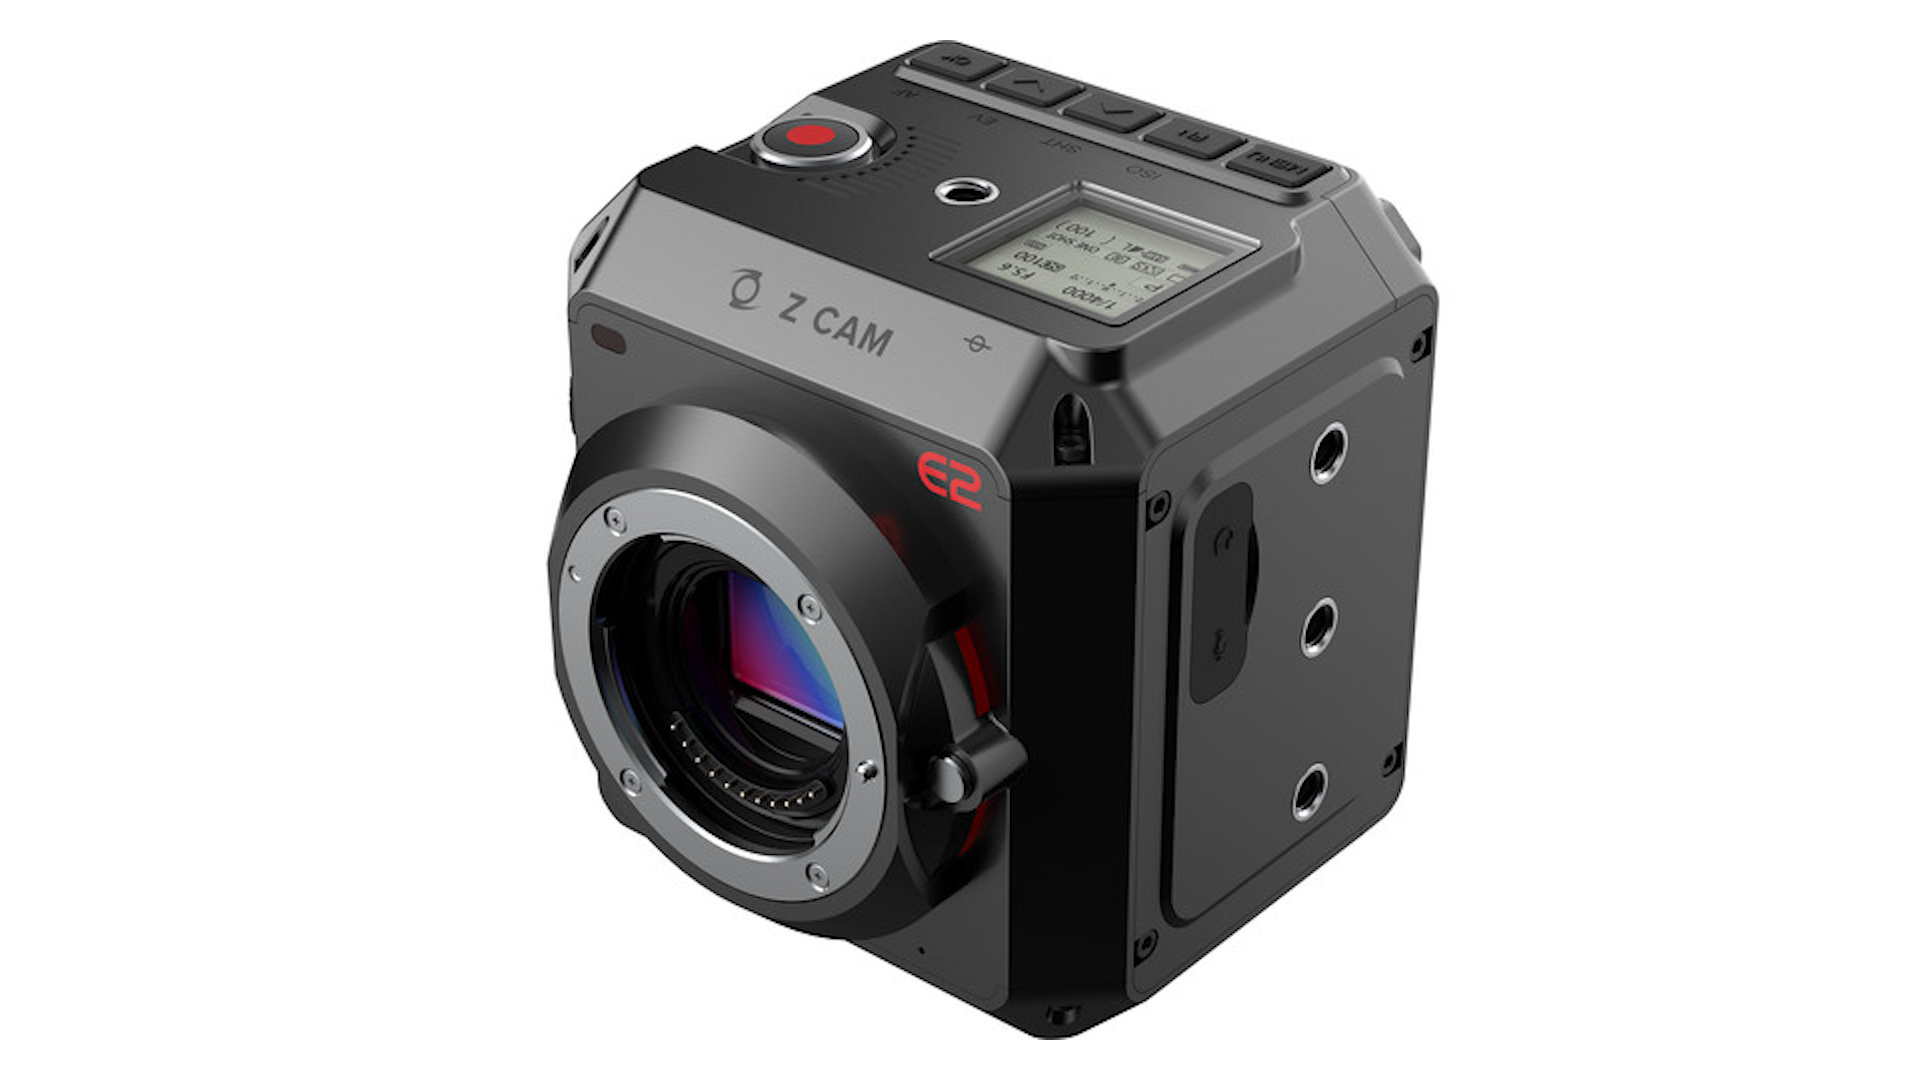
Z CAM E2 camera
For a while now I have been following the development of micro four thirds cameras. To be specific, I bought my first one exactly 10 years ago, the Panasonic LUMIX GH1.
Back then it was hampered by a weak codec (Full HD, AVCHD in 17Mbps) and the max. usable ISO value was 400, but the Voigtlaender lenses gave it the full frame look (e.g. the 25mm f0.95), and the hack of V. Kiselev at a later stage improved the bitrate to a stable 25Mbps. All in all, I loved the images – so much that I never sold it…
Fast forward 10 years and I have the new cinema camera Z CAM E2 from the Chinese manufacturer Z CAM in my hands. A micro four thirds camera capable of shooting 4k DCI using a LOG profile (Z-LOG2) recording ProRes HQ 10bit 4:2:2 internally up to 60fps (4k H265 up to 120fps, 160fps in 1:2.4 mode). Wow!

Z CAM E2 – Minimum Rigging
Setting up the Z CAM E2 Cinema Camera for the Trip
What I always liked about the micro four thirds format is the possibility to adapt almost any lens, including the option to use a speed booster (0.71x). The speed booster allows the use of Canon EF glass for example, while at the same time increasing the light sensitivity by one stop.
In 4k DCI mode (4096 x 2160) the crop factor of the Z CAM is about 1.9, using the speed booster gives a crop of 1.35 approximately.
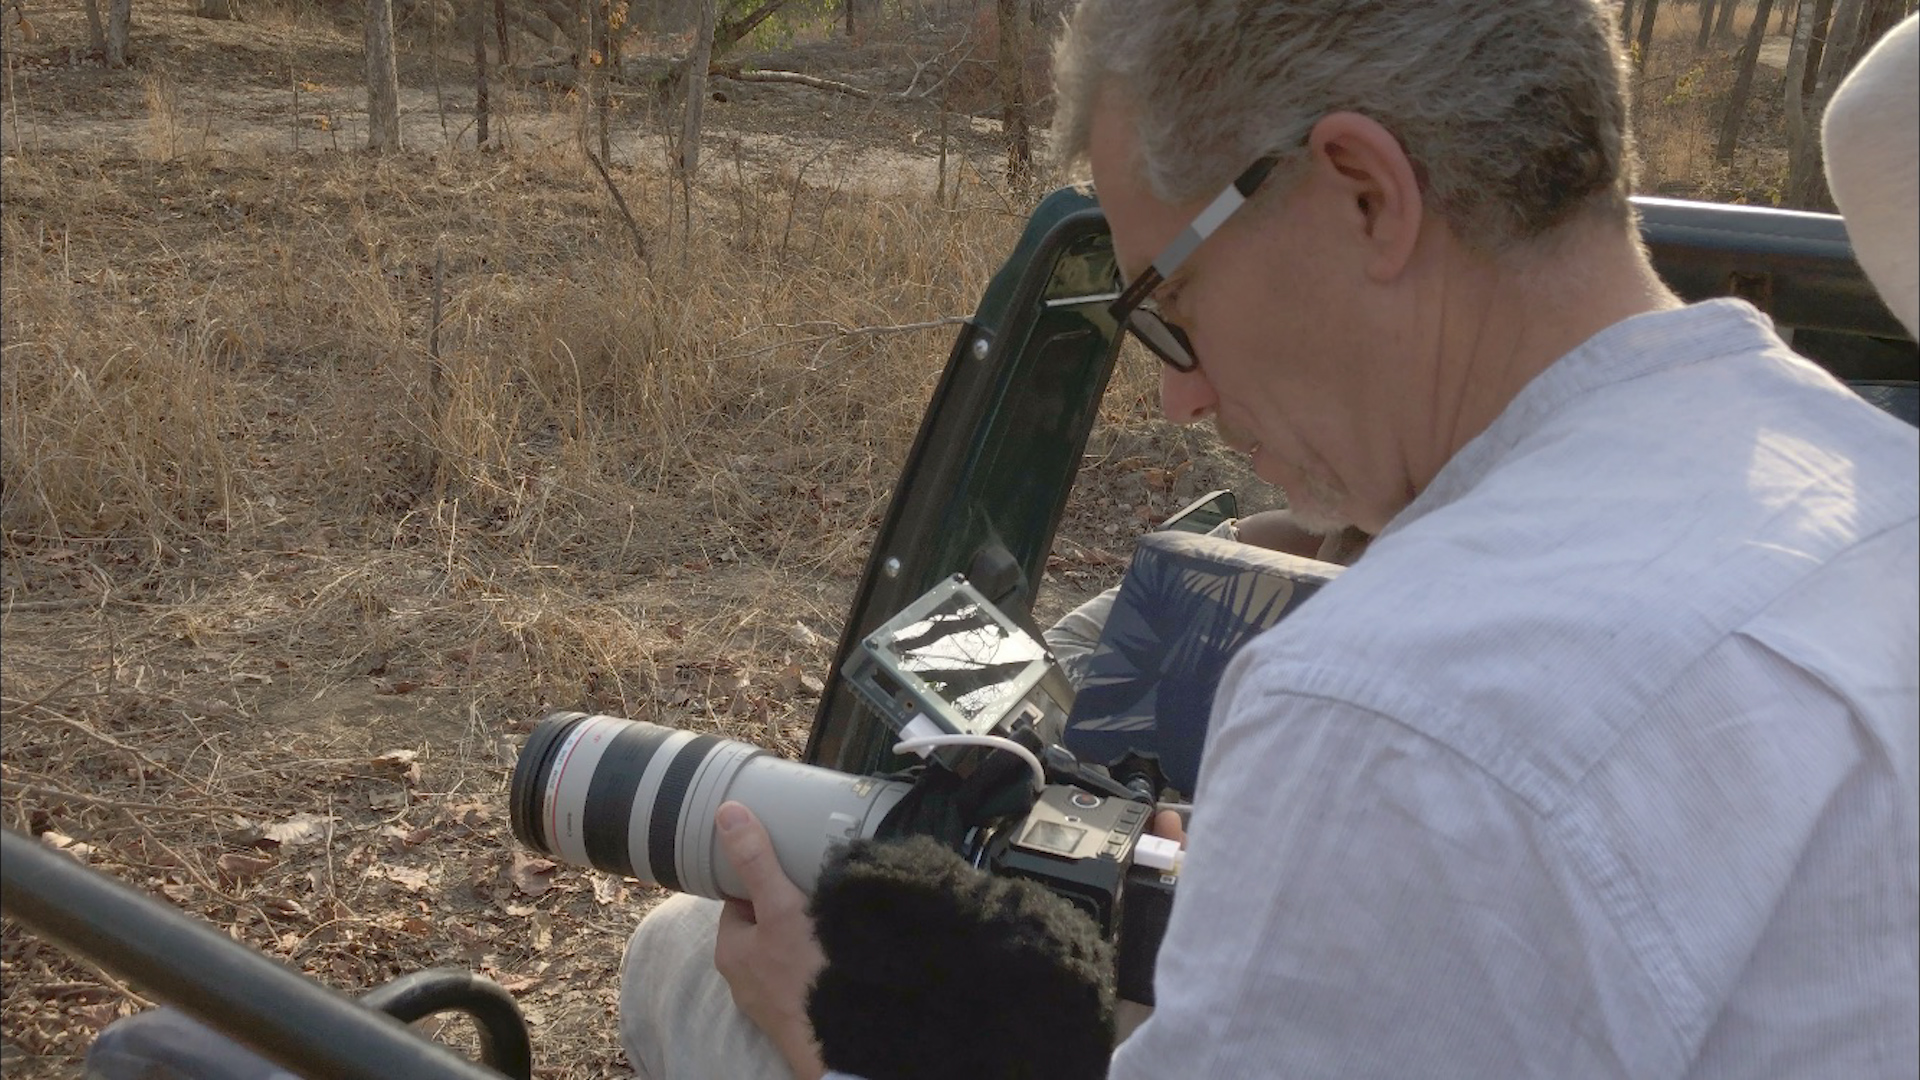
Unfortunately, we had no cage available for the Z CAM, but the camera has various ¼” mounting points on top, bottom and on the sides. In conjunction with the Z CAM E2 I used an early prototype of the Portkeys BM5 monitor mounted with a magic arm, see the image below (the released version is black, the prototype had an anodized green surface finish).
For sound, I took a Sennheiser MKE 440 with me, using the 3.5mm audio input on the Z CAM E2 – mounted to the side, which was not ideal. Also, the recorded sound quality via the 3.5mm input leaves a lot to be desired. I hope Z CAM can improve on the audio part in the future.
Lenswise, I opted for two lenses only: the Olympus 12-100mm f4 for the documentary part (it has great image stabilization), and a Canon EF 100-400mm f4.5 – 5.6 version 1 using a Metabones speed booster for the wildlife part.
Note that with the 4k DCI settings and 1.9 crop factor vignetting can occur at the widest setting of the Olympus lens.
The clever location of the Z CAM E2 battery allows the use of standard Sony NPF batteries with various capacities (and protects the HDMI port at the same time). For my trip I took a few 5200mA (NP F750) ones with me – good news is that power consumption was surprisingly low hence battery life was no issue at all.
The same type of battery can be used for the Portkeys BM5 monitor as well which is a big plus, and I needed all the spare batteries for the monitor, as its power consumption was quite high.
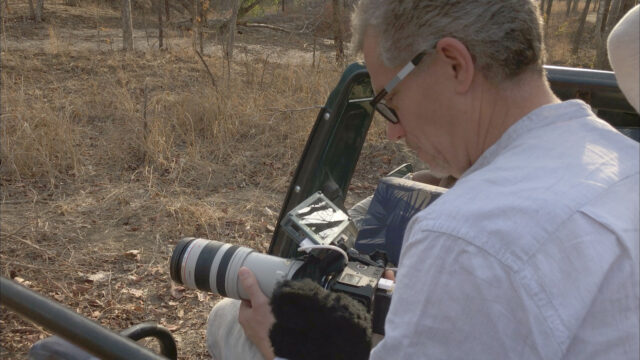
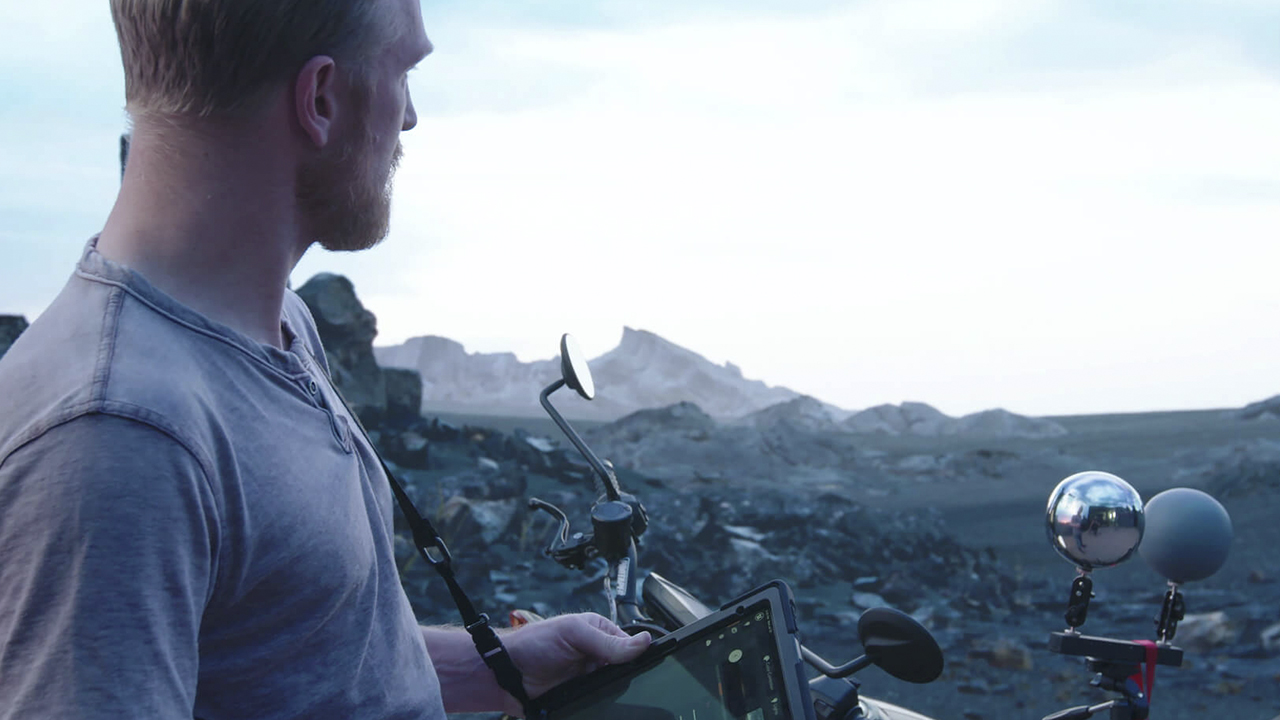
Man at work- With the Z CAM E2
Build Quality and the Safari Trip
Temperatures in the Indian jungle would be as high as 45°C, the climate is very dry hence exposing the gear to the bumpy, dusty roads in an open jeep got me a bit nervous. Would the cam and the monitor survive?
The answer is yes. I had no issues at all – the build quality of both monitor and camera is top notch, and there was no overheating of both devices. The monitor has a fan which I turned down to the lowest setting to avoid picking up the sound, so it got very very hot. It still worked reliably.
Image Quality of the Z CAM E2 Cinema Camera
Now, this was a major deciding factor for me to take the Z CAM E2 cinema camera on my trip – 4k DCI ProRes HQ in a small but durable package – despite the risk of taking a new, unknown camera with me I just couldn’t say no.
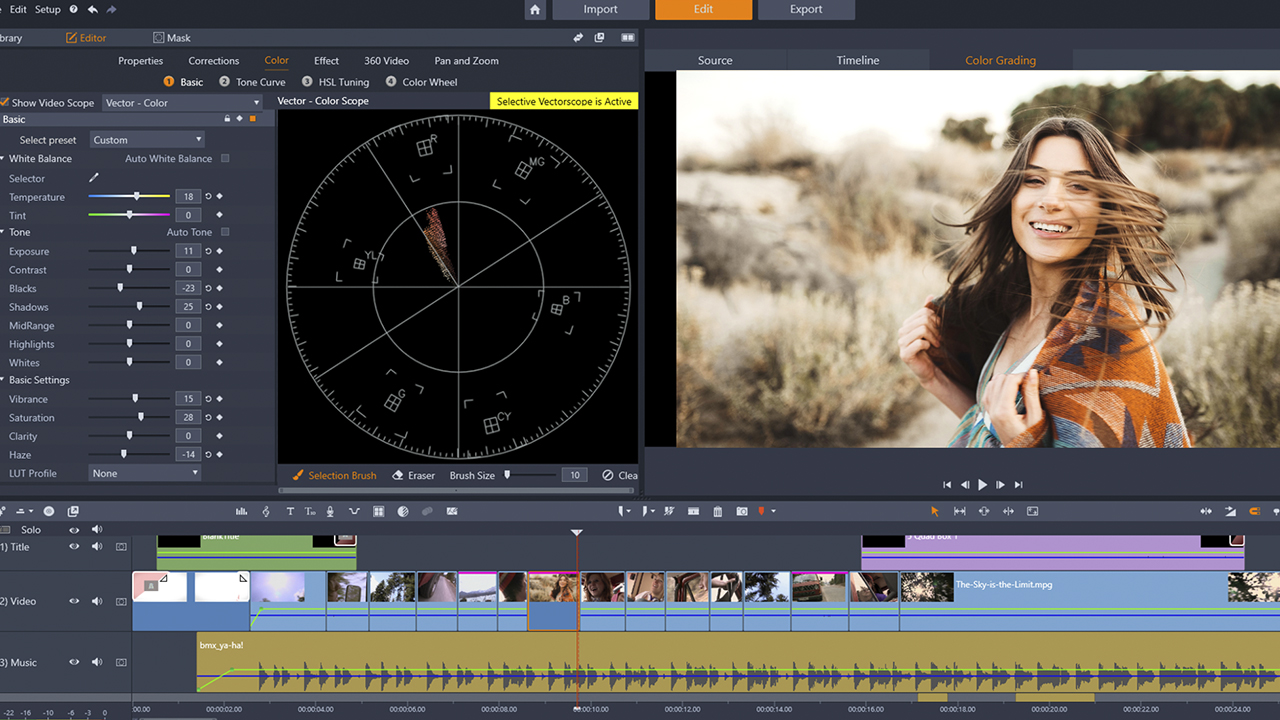
And the Z CAM E2 did not disappoint – see the video on top. The camera has a very organic, detailed image with fantastic, out of the box colors. Grading the Z-LOG2 profile using the LUT’s supplied by Z CAM on their homepage was a joy and is as easy as it can get.
On the night shots, I had to ramp up the ISO to 16000 – I think the results are still OK and usable.
Dynamic Range
Z CAM claims 13stops of dynamic range on their marketing materials, so I was quite curious how it would fare in our standard test (click
here for more info on how we test). Firmware tested was 0.86, raw was not available at that time.
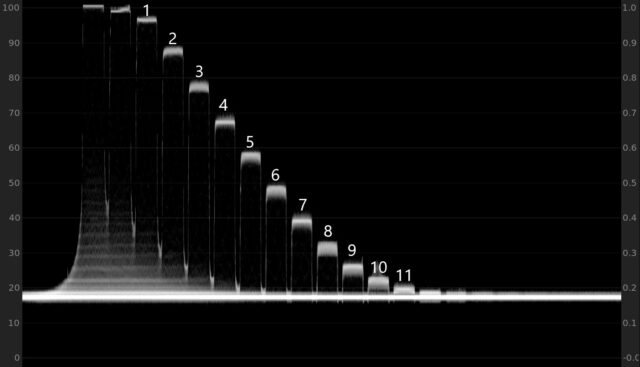
Fig.1: Waveform plot of the Z CAM E2 cinema camera at ISO500 using Z-LOG2 ProRes HQ – about 11 stops can be identified above the noise floor.
The waveform plot of our Xyla 21 stepchart shows about 11 stops (see figure 1). Using IMATEST to calculate the dynamic range I got a result of
10.8 stops at ISO 500, Z-LOG2 using ProRes HQ 4k DCI 23.98fps (at a signal to noise ratio of 2, 11.9 stops for SNR = 1, see figure 2).
The Z CAM E2 uses a dual ISO sensor, so I also tested the second gain value of ISO 2500 and got a result of 10.4 stops (SNR = 2).
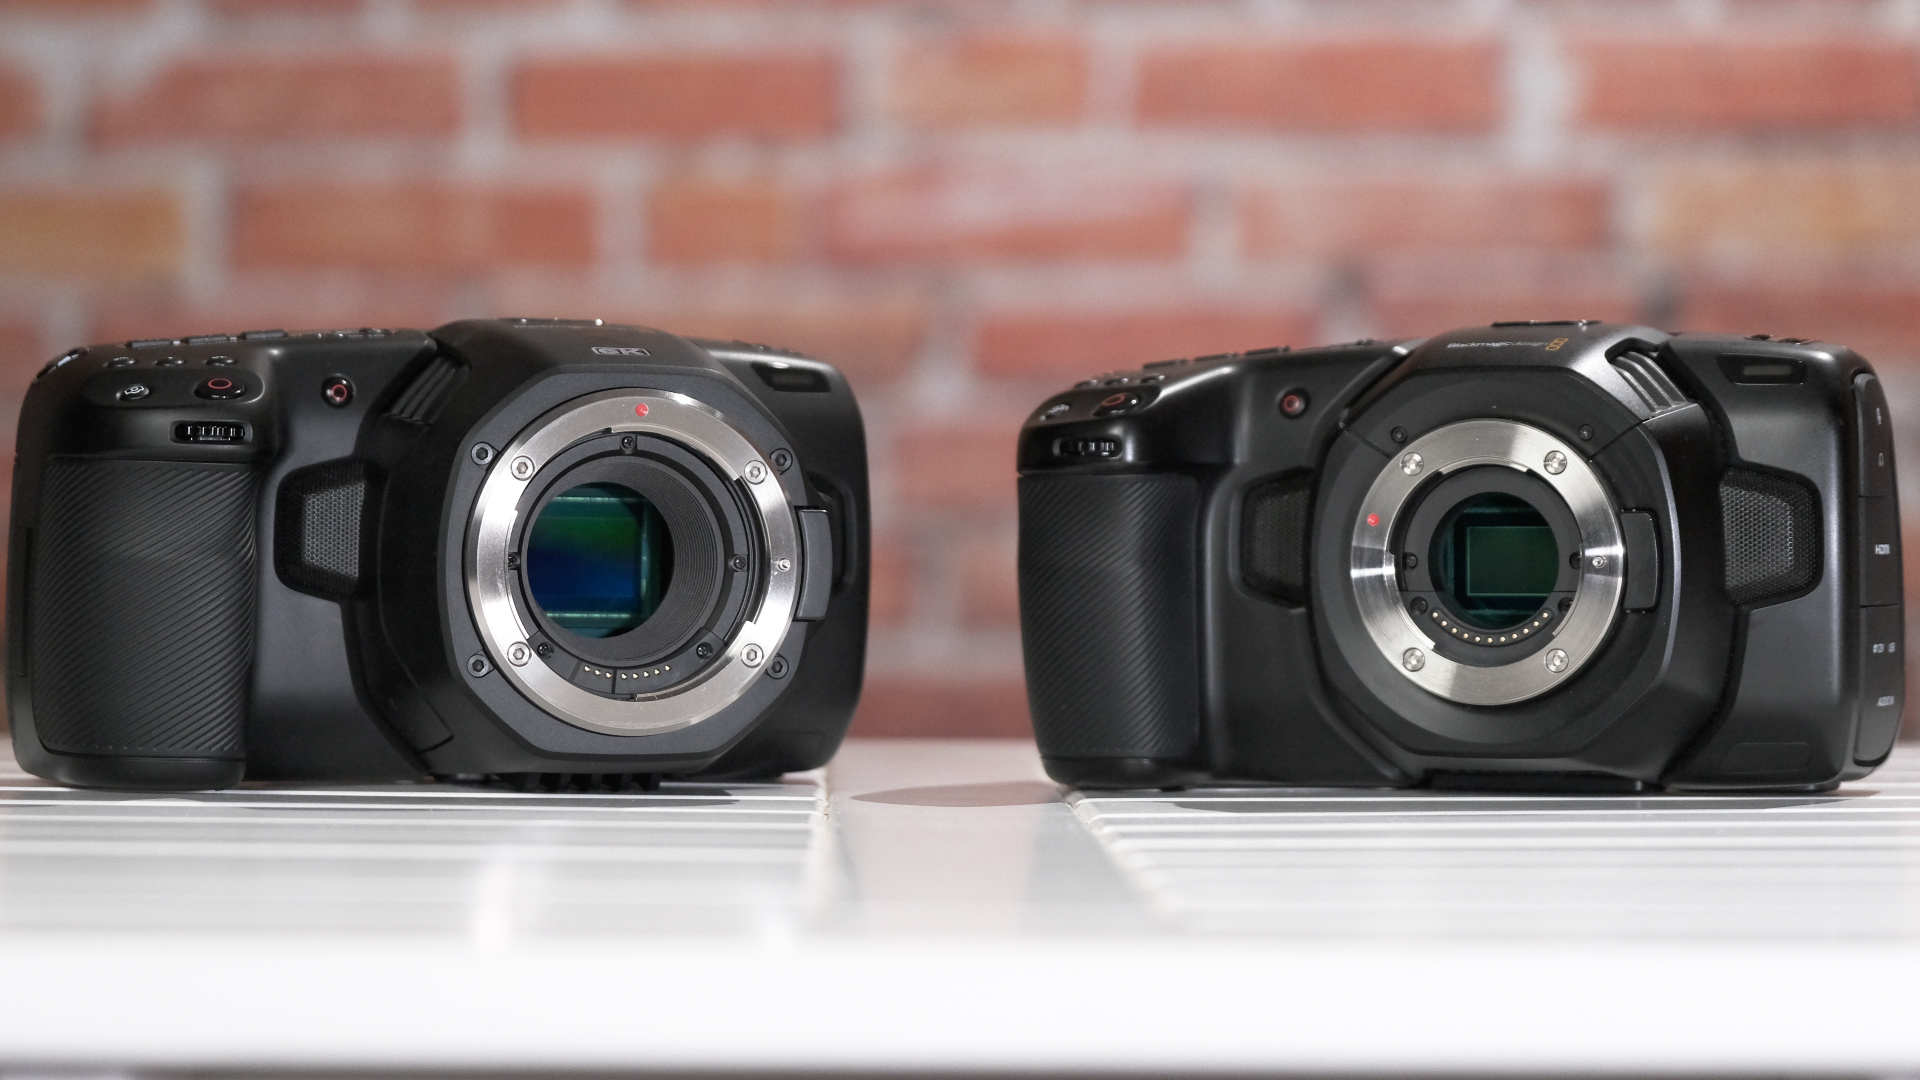
These are very good results for a micro four thirds sensor, almost exactly the same as for the Panasonic GH5s (10.7 stops) and coming in second behind the other four thirds cinema camera rival, the Blackmagic Pocket Cinema Camera 4k, BMPCC4k, which has 11.6 stops of dynamic range in ProRes HQ.
The Z CAM E2 also offers an HDR mode, where it captures a second image with an 8 times higher shutter speed for the highlighted part and merges it into one video frame (to increase the dynamic range by additional 3 stops).
I have tried this option in practice but quickly abandoned it for moving shots, as the motion blur (or partial lack thereof) of the resulting image looks weird. It may work for a static interview though, or a situation where the scene demands a higher shutter speed (1/200 and up).
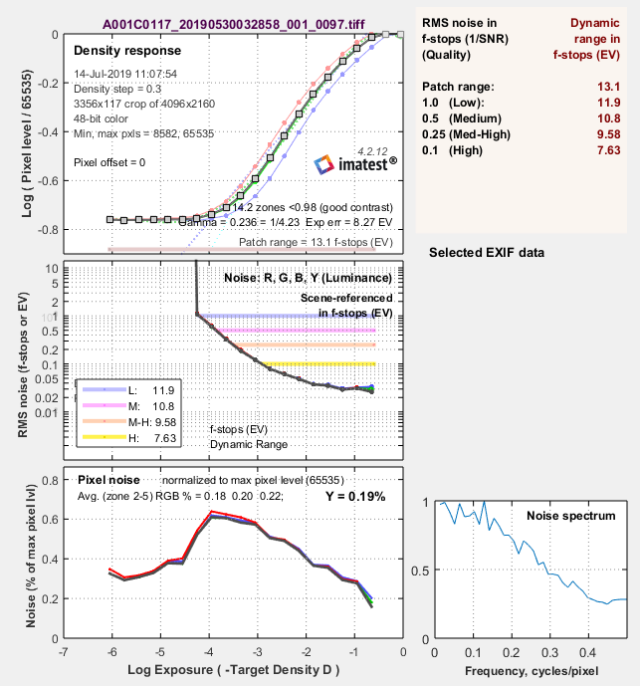
Fig. 2:IMATEST calculates 10.8 stops of dynamic range for the Z CAM E2 cinema camera at a signal to noise ratio of 2 for 4k DCI ISO500 ProRes recording using Z-LOG2 (1/SNR = 0.5, medium value in the upper right hand table).
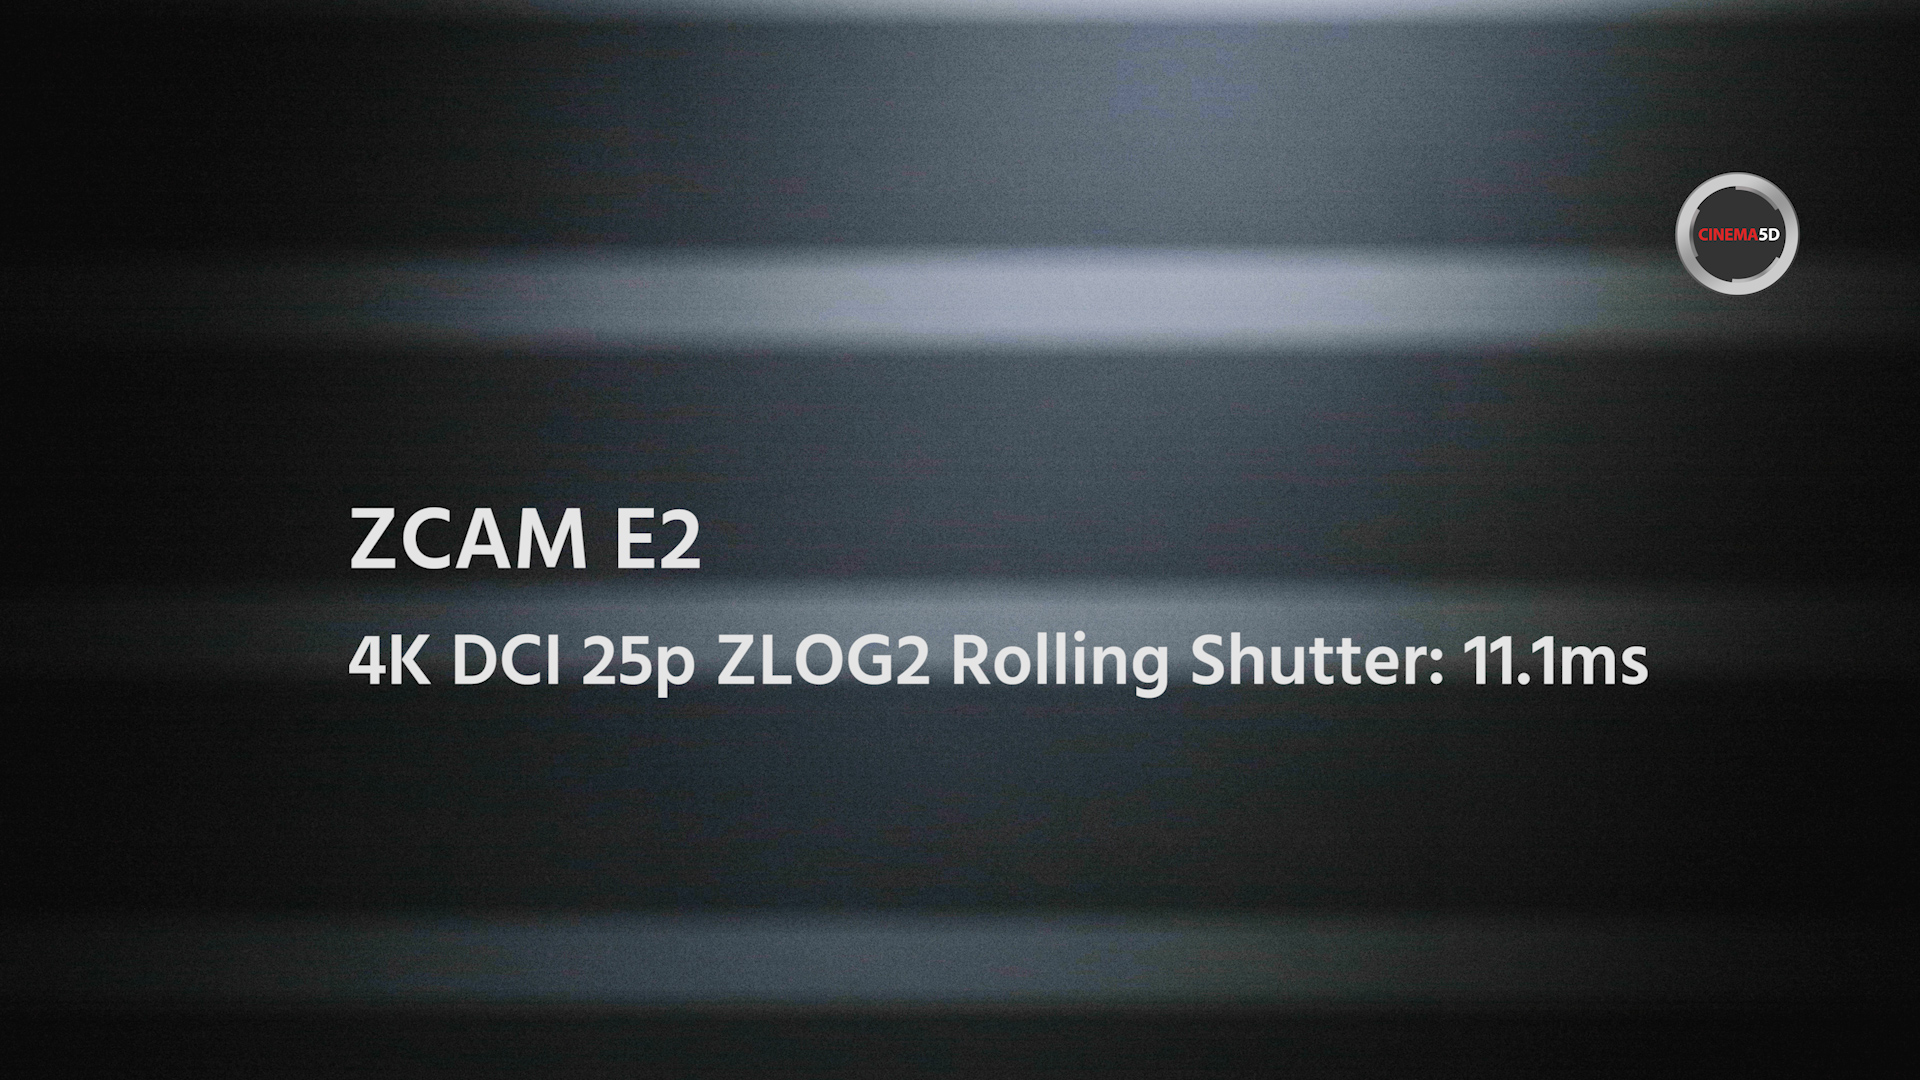
Z CAM Rolling Shutter
We are using a new test method based on a high frequency, quartz & microcontroller based strobe light at 300Hz. As the sensor readout happens from the top to the bottom, we are getting a sequence of black and white bars from the strobe.
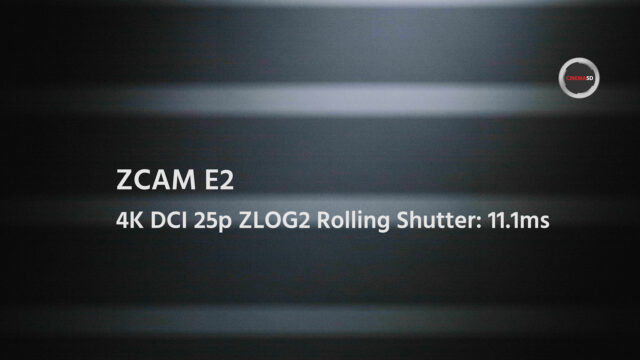
A quite surprising result on the rolling shutter measurements, which adds up to the very positive overall impression: in 4K DCI 25p mode (using ProRes HQ and ZLOG2) I got a very good result of
11.1[ms]. For comparison, the BMPCC4k has a rolling shutter of 16[ms] in UHD 25p mode.
Z CAM Rolling Shutter effect
The Z CAM Universe – the Facebook Group, the app, and the Camera’s Menu
First and foremost the Z CAM facebook group is worth mentioning, the spirit of conversation is very good and people from Z CAM as well as visitors are helpful, including the CEO Kinson Loo who answers questions very often himself.
There is also a nice Z CAM smartphone app available for IOS (Android still in a beta release), which connects to the camera’s wifi and allows access / display / change all settings as well as providing a full screen image preview with little latency.
In essence, you could use your smartphone instead of a monitor if you accept some lag between the recorded and image view.
For the camera part, all the exposure tools (zebra, false color), as well as focus peaking, work very well, although the focus peaking is very strong – I would prefer an option to adjust this in the menu (not available currently).
The menu itself is straightforward and well structured, also custom presents for the function buttons are available. However, some of the settings require deeper dives (changing the frame rate for example), hence doing that in the heat of the action does not work so well.
One thing to be aware of is the fact, that for ProRes no in-camera playback option is available (firmware version 0.86 at the time of shooting). I hope this changes with a future firmware.
The Z CAM E2 in Conjunction with the Portkeys BM5 Monitor
In theory, this combo should work very well. The Portkeys BM5 monitor (for detailed specs see our article
here) is a 5” FHD monitor which allows via a separate cable to display and change settings in the camera’s menu on the touchscreen – on our early prototype this didn’t work though and a newer firmware wasn’t yet available.
The screen itself is very bright (2000 NITS), even in direct sunlight I had no issues seeing the image. Unfortunately, the surface of the screen is very reflective which can hamper the viewing experience, see figure 3 below.
Also, it gets very very hot and is quite power hungry. I used the “low” setting for the internal fan to avoid picking up the sound on video.
All in all, it is a good monitor, but I didn’t like one detail: it only takes 1080p signals via HDMI, although the Z CAM E2 could provide a 4k signal. Hence, you have no good way to judge focus on the monitor itself for a 4k HDMI signal, as neither punching in (1:1 pixel view) nor the in – built focus peaking of the monitor would display this signal accurately.
So, you have to rely on the camera’s focus peaking (displayed via HDMI to the monitor).
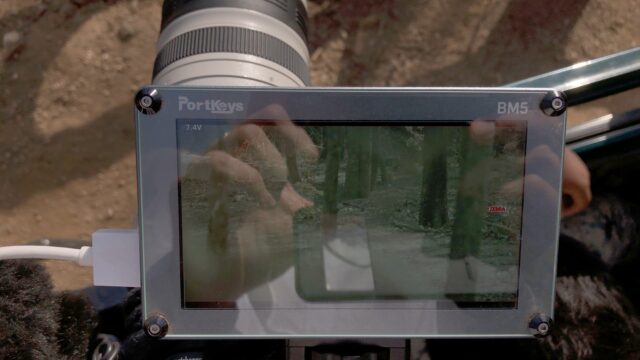
Fig. 3: The Portkeys BM5 monitor – bright (2000 NITS) and well built, however the screen is very reflective which can hamper the viewing experience outside.
Conclusion
The Z CAM E2 cinema camera is a great new addition to the line of micro four thirds cameras, and got so many things right in the first place – first and foremost the image (audio via the 3.5mm input leaves a lot to be desired though).
I love the fact that it allows high frame rates, ProRes recording, and many more things. Z CAM is definitely a company to watch out for – also, I am curious to see their new APS-C and full frame cameras (S6, F6, and F8) that are scheduled to arrive later this year.
However, comparing the E2 to other cinema cameras in this sensor class the competitor BMPCC4k cannot be neglected. The BMPCC4k is significantly less expensive, has a large build in screen (5”) and allows internal ProRes as well as 12bit RAW recording (Blackmagic raw). Also, Blackmagic managed to squeeze out 0.8 stops more dynamic range.
Hence, as always you have to choose the camera wisely that you need for your particular application, and given the other features of the Z CAM (multi-cam recording & syncing, wifi, etc…) it may be the perfect choice for you!
 Zeiss Lens Ambassador Greg Watermann captured John Travolta on the set of Pitbull’s ‘3 to Tango’ video with Sony a9 and Zeiss Batis 40mm f/2 CF lens.
Equipment Used:
Sony a9 camera
Zeiss Batis 40mm f/2 CF Lens
Zeiss Lens Ambassador Greg Watermann captured John Travolta on the set of Pitbull’s ‘3 to Tango’ video with Sony a9 and Zeiss Batis 40mm f/2 CF lens.
Equipment Used:
Sony a9 camera
Zeiss Batis 40mm f/2 CF Lens